Showing posts with label art. Show all posts

Sunday, 22 February 2015

Virtual Refrigerator: Valentine's Day Teacher Card Crafts

Alyssa enjoys creating gifts for others. This year she made adorable Valentine's Day card crafts for her dance and piano teachers.

Materials Needed
Scissors
Construction Paper
Cardstock
Colored Pencils
Glue Stick
Heart-Shaped Stickers

The first card was given to her main dance instructor. The front said, "Happy Valentine's Day! Bee Mine." The back of the card said, "Thank you for "bee-ing" a great teacher!" We found out that her teacher actually LOVES bees after giving her the card.
Front
Back
The second card craft was give to her dance teacher assistant. It was a cat Valentine that said, "You are the "purrfect" teacher!" on the back of the card. She signed her name in cursive since she's been learning cursive letter formations.


The last craft card was made especially for her piano teacher. She cut out a large red heart and glued it on a piece of white cardstock. Then, she folded the card in half. She drew a piano note on the front using colored pencils and heart-shaped stickers with a To: Mrs. Lu note. The inside was actually a pop-up card! She wrote, "You make my heart (sticker) skip one beat! Happy Valentine's Day!" I love the play on words! She also drew a musical note on the pop up area using colored pencils and heart stickers.
Front
Inside
This was a fun, creative activity we did as part of Alyssa's Valentine's Day countdown. She also made Valentine goodie bags for her dance classmates, but I think I forgot to photograph them. I'll post the pics if I find any.

Helpful Websites That Inspired Our Projects
Crafty Morning - "Bee Mine" Valentine's Day Craft
Crafty Morning - "Purrfect" Valentine Craft

I will link this post up at Virtual Refrigerator and Share It Saturday.

Thank you for visiting A Learning Journey! 
God bless,
Tracey

Wednesday, 18 February 2015

Let's Boogie

A couple of years ago, my daughter received a Boogie Board as a birthday gift.  She was a little young and totally uninterested in drawing or learning how to write.  As a result, my husband and I spent more time playing with this toy and it eventually ended up in the bottom of a basket of toys.  Fast forward about a year or two and we have a little girl has blossomed into an artist and a kid who really wants to practice writing letters and words all the time.  Every time I turn around, there is another drawing or list of words on scraps of paper in our house.  While we try and save as much as we can, many of them are not what Quinn had in mind so they end up getting thrown away.  As she has become more interested in spending her free time engaged in drawing or writing, I have found ourselves trying to use other less wasteful things.  She can spend hours working on an easel but that isn't always so easy to take with us when we are on the go so I was happy to remember our Boogie Board and pull it out of the basket.

For those of you who don't know about it, the Boogie Board is an ultra-light LCD writing tablet that can take the place of paper and pencils.  It's great for you on the go people who want to encourage your kids to draw/write and not always be attached to the iPad, iPhone, games, etc. It can be used for a variety of things and by kids of all ages.  The Boogie Board comes in a variety of colors which can sometimes make a big deal to certain kids (for example, my girlie girl loves the pink and flowered one).  Kids can draw, write and play games on the board and with a simple touch of a button, the screen clears and they can begin again.  If they make a mistake, it can be erased and they can try again.  Since the Boogie Board is so light weight, it can be thrown in a backpack or a purse without being too much of a burden.  I love looking out in a waiting room and seeing kids playing on theirs to pass the time between appointments.  We love to take ours in the car or on the subway to keep Quinn occupied and make the ride go by much faster.

I have not only been using the Boogie Board at home.  It has been a great tool to use at work and the kids love to use it.  It has been used for several purposes depending on the goals and needs of each particular child.  For example, it's a great tool to use for making To Do lists with kids who need the structure and routine.  I will write down our schedule for the session and after they complete each activity, they can then cross it off.  For kids who are working on handwriting, you can actually have them write the list for your session.

My favorite thing to use the Boogie Board for is to practice handwriting.  I tend to use it in conjunction with different iPad apps which can be a big motivator for those kids who like to avoid any handwriting activity.  My go to handwriting apps are LetterSchool or Writing Wizard as they are the most interactive and not just about tracing letters.  Kids will practice a letter on the iPad and then immediately pick up the Boogie Board to practice writing the letter.  There are several handwriting games you can play with kids based on their skill level.  For example, for kids who are learning how to read, you can make the sound of the letter and they then have to write the letter.  Another fun thing to do is to write words with some letters missing and have the kids guess what letter goes where and fill in the words.  If you have really creative kids, you can have them makeup their own handwriting games!

Some of the other occupational therapy goals that can be focused on using the Boogie Board are:
Improve Grasping Skills-each Boogie Board comes with a thin metallic stylus.  Any stylus is good for encouraging a proper grasping pattern, but I find that the stylus that comes with it is just the right size for adding a pencil grip onto.  I encourage the kids I work with to use a proper grasp whenever they use the stylus.
Improve Graphomotor Skills-I sometimes feel guilty about the amount of paper that I waste on daily basis practicing writing letters and numbers with the kids I work with.  Oftentimes, the kids end up leaving said papers on the floor in the waiting room and they never even make it home to show off to their parents.  With the Boogie Board, a child can practice over and over again without the guilt of what waste we are producing.  If kids want to show off their work to their people, you can take pictures and email it to them!
Improve Bilateral Coordination Skills-I love to have kids sit on the platform or bolster swing while using the Boogie Board as it forces them to use two hands.  They must hold the board with one hand and hold the stylus with the other.  When on a swing, they are also working on building trunk control and strength at the same time.
Improve Social Skills-I like to find ways to improve social development with all toys/products I use at work.  The Boogie Board can be used to encourage social skills by having kids play simple games together on it.  Tic-Tac-Toe, the Dot Game and Hangman are three good games that can be played in small group settings.

I love that the Boogie Board can be used for so many different things by children of all ages and it doesn't cost too much (approximately $30).  The Original Boogie Board can be found online but I have also seen it in several of the smaller, privately owned toy stores in my neighborhood.  While you may end up paying a little more in these stores, I always try and support small businesses whenever I possibly can.

Do you use a Boogie Board while working with your kids?  Do you have any other fun games or activities that you do while using it?  I would love to hear from any of you if you do.  I'm only a click away and love hearing from you all!


Thursday, 4 December 2014

Virtual Refrigerator: REJOICE

I bought Alyssa The Gift of Love Deluxe Set developed by See the Light as a present last Christmas. The stories and art lessons are related to the Christmas story. I thought it would be fun to revisit the lesson this month.

Heidi Shorts, the art teacher on the DVD, taught my daughter about Creative Lettering. The lesson lasted 33 minutes. After watching this lesson, Alyssa utilizes the art technique of Creative Lettering in her free time quite often now. This set will bless any art lover if purchased as a Christmas gift or stocking stuffer!

Materials Needed:
See the Light Gift of Love DVD Deluxe Set
Extreme Colors Ultra-Bright Colored Pencils
White Construction Paper
#2 Pencil and Pencil Sharpener
Eraser
Ruler
Black Light

Black Light On
I will link this post up at Virtual Refrigerator. Thank you for visiting A Learning Journey! Come back again real soon! 

Disclaimer: These are NOT affiliate links. I just wanted my readers rot be aware of these awesome art resources.

Friday, 19 September 2014

Sunflower Art Project

My daughter watched the Van Gogh Sunflowers art lesson on the Kindergarten Home Art Studio DVD which is currently available throughout the Homeschool Buyers Co-op. We bought the DVD at a discounted price. The Homeschool Buyers Co-op is FREE to join. Just click the previous link.

Alyssa (Age 6 1/2) followed the instructions and created this beautiful masterpiece for my sister. My sister and her husband love sunflowers. My sis will be visiting Texas soon - my daughter can't wait to surprise her . . . that is if she hasn't seen this post.

Art Supplies Needed:
Blue, Yellow, Green, and Brown Construction Paper
Plastic Cup
Red and Yellow Paint
Paintbrush
Black Colored Pencil


By the way, Alyssa is participating in the Spelling You See "No Rules Day Photo Contest." She really wants to continue using this spelling program once she completes Americana. Please do us a favor and visit Spelling You See's Facebook Page to vote for her artwork. Thank you for your support! 

Disclaimer: I have used a personalized Homeschool Buyers Co-op referral link in this post for the co-op and for the Home Art Studio DVD's. If you purchase this product through my link, then I will earn 500 SmartPoints. If you join the co-op, I also receive SmartPoints. Thank you for your help supporting our homeschool!

I will link this post up at The Virtual Refrigerator Blog Hop.

Saturday, 30 August 2014

Virtual Refrigerator: Fall Apple Art

Alyssa (Age 6 1/2) is enjoying her art time more and more every day! The chalk pastels can be pretty messy, but thankfully my daughter cleans up after her lesson. We decided to do Apple Art especially since fall is right around the corner.

Supplies Needed
  • Paper
  • Chalk Pastels
  • Oil Pastels (Optional)
We watched the Apple Chalk Pastel Tutorial at Southern HodgePodge in order to complete today's art lesson.

Apple Art Drawing
Medium: Oil Pastels
Apple Art
Chalk Pastels
I will link this post up at The Virtual Refrigerator Blog Hop.

Thank you for visiting A Learning Journey! God bless! 
Tracey 

Thursday, 14 August 2014

Virtual Refrigerator: Shark Week!

My daughter's interest in sharks has increased since the announcement of Shark Week. Alyssa has been learning about sharks using the videos available through Discovery Education and by reading numerous books on the topic. One of her art projects this week was to use oil pastels (instead of chalk pastels) to create a shark in the ocean. I love how she added in other ocean animals and plants.
Artist: Alyssa
Age:6 1/2
Subject: Sharks
Title: Out for a Swim
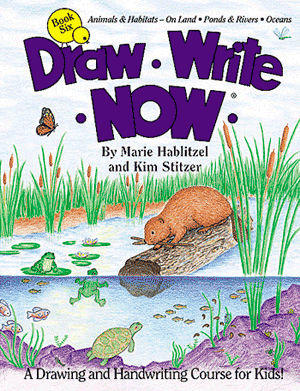
She utilized the step-by-step drawings for the starfish and shark from her Draw Write Now (Book 6) and the shark art tutorial from Southern HodgePodge as guides.

I will link this post up at The Virtual Refrigerator. What art project will YOU share this week? I can't wait to see it. Please feel free to leave a link to your post in the comments section.

Thank you for visiting A Learning Journey!

Thursday, 22 May 2014

Virtual Refrigerator: D is for Turtle Drawing

Alyssa drew this adorable turtle after viewing a drawing tutorial using Mike's Inspiration Station Volume 2. My daughter has been using the entire set since Christmas. Her drawings always amaze me - this is one of my favorite drawings! I am most grateful that we won this set. I have definitely seen my daughter's drawings improve. I wish I had access to products like this when I was a child. Alyssa used her Mr. Sketch markers to color it.

I will link this post up at the Virtual Refrigerator, a weekly blog hop co-hosted by Angels of Heart, Every Bed of Roses, Homeschool Coffee Break, and a Glimpse of our Life. I will also link this up at Marcy's Blogging Through the Alphabet Linky at Ben and Me for "Letter D." Come join the fun!
Ben and Me

Friday, 28 March 2014

Free App Friday...Who Knew?


This will be a short post, but one that I think many will appreciate.  Not sure how I hadn't heart of it before, but there is a great website,  that offers a Free App Friday blog. Smart Apps For Kids is a website dedicated to helping people find the best apps out there.  They will help guide you by age, subject and skill you are interested in working on.  today's list.  While many of them are not ones that I am familiar with, I was excited to see some really good ones on there that are already on my iPad and enjoyed by many of the little ones I work with.

For example, Drawnimal by YAYATOY is on there.  This is a great app that can work on not only introducing children to the letters of the alphabet but encourage drawing skills.  Many of the kids I work with have a desire to learn how to draw and I have struggled with the best way to teach them.  I have this on both my iPad and my iPhone.  I have had better success with it using my iPhone but am looking for the writing surface to use in order to use the iPad as I think it is more interactive and exciting for my younger children.

Another one on today's list is Shiny Bakery.  My daughter loves Shiny Party and the characters in this game are the same.  Alice the Zebra has opened her own bakery and she needs your child's help.  A child has to follow the recipe and then help her bake cookies or cakes and then decorate them.  This app is great for working on developing a sense of numbers, expanding a child's creative juices and improving problem solving skills.

There is an app I have been very excited about that is also mentioned on today's list but is not a free one.  However, I think that the $.99 will be well worth it for Bug Art by one of my favorite app creators out there, Little Bit Studios.  While I have not had a chance to use Bug Art, I continue to use Bugs and Buttons 1 and 2, Bugs and Bubbles and Bugs and Numbers on a daily basis with my kids at work and my own daughter loves them as well.  Bug Art is described as an app that allows your child to free paint whatever they want to create.  They can learn to draw with interactive tracing or design their own bugs.  Using their bug creation, they will then be able to play, explore and challenge themselves in a different games and environments.  Their are 13 other bugs included in the game that your bug can compete against in mini games.  Like I said, I haven't played this game but am sure it won't disappoint.

For those of you who are constantly on the lookout for new and exciting apps, keep the Free App Friday list by Smart Apps For Kids on your radar.  I know that I will be checking in every Friday to see what apps I can find.  I love a bargain and there are lots on here.  Do you have any other app lists that you subscribe to and can recommend to all of us?  Please share if you do.  I am always a click away and love hearing from you all!

Sunday, 16 June 2013

Collage Fun for Little Hands

I am constantly on the lookout for arts and craft projects that I can do with my preschoolers at work.  Something that can be worked on over a few sessions but not so many sessions that they lose interest in the project.  A few weeks ago while looking for a birthday present, I found this really cute set of animal collages by Djeco (be sure to check out their website.  It's totally cute and interactive!).  The Djeco Collages for Little Ones has already become a favorite with some of my littles at the gym and can't wait to try it out at home with my 3 year old daughter who has recently become quite interested in arts and crafts.

This kit comes with 4 animal collages and all the materials needed in order to complete them.  For those of you who like organization, this set is perfect because the materials come in separate envelopes.  This is great for the kids too as it limits the number of pieces and materials that they have to sort through which will ensure success.  Everything you need is in the kit including glue.  Take a look at the picture below and you can see how the kit works.

There are 4 animals in each kit.  They are all SUPER cute!  When I was doing this at work, the little girl had a really hard time picking out which one she wanted to do.  There is a blank animal board, an envelope filled with all the pieces for each collage and an instruction booklet with step by step directions.  Depending on the goals you are working on with each child, you can adapt the expectations for completion.  For example, you may be working on increasing a child's level of independence so you would just hand them the kit and see what they can do before you have to help them.  You may also be working on getting a child to ask for help when they are challenged by an activity.  You can purposely leave out some of the materials needed in order to complete the collage which will encourage them to ask you for help.  And when they finish the collage, the look of pride is amazing. One of the kids I was working on this with could barely wait for her mom to come pick her up so she could show the finished product to her.


Before
Middle


Completed

Here are the occupational therapy goals that can be worked on:
Improve Visual Motor/Perceptual Skills-the set comes with an instruction booklet that gives step by step directions on where all the pieces go.  I like to have the kids take out all the pieces and place them on the working surface in order for them to work on visual scanning and organizational skills.  As they turn to each page, I have them take all the pieces needed for that particular page and put them to the side.

Improve Fine Motor Skills-many of the pieces are tiny and require good fine motor control and using good grasping skills.  I try and encourage the kids to use their "pinchers" (thumb and pointer finger) when picking up the pieces.  This is a great activity to work on improving fine motor control; when putting the pieces in their place on the collage, you have to have good control so it is in the right place.

Improve Bilateral Coordination-I find this is a good activity to practice bilateral coordination.  This can be done when putting the glue on the pieces and holding the board down to place the collage pieces on.

Improve Attention and Focus-this is a fun way to work on improving a child's ability to focus and attend to a task.  You can set a timer and have them work on it for a certain number of time or tell them they need to get through a certain number of steps.  Good attention/focus is important when putting the pieces on the board in the correct place.

Improve Social Skills-this is a great activity to do with a group of 2 children.  You can work on taking turns putting pieces onto the board.  Instead of having a grownup assist, you can encourage the kids to ask each other for help.  When working with other children, it will will also work on them becoming more flexible and doing things that they may not want to but have to because their friends want to.

Improve Creativity-while there are templates to follow, you can also work on improving creativity and thinking out of the box by giving kids the materials they need and asking them to create their own animal.

While you can easily find the set online, I recommend checking out your local toy stores and seeing if they carry it.  I think it is always best to support small businesses when possible.  I know that in my neighborhood of Park Slope Little Things Toy Store sells many of the Djeco products.

I hope you and your littles have fun with this arts and crafts set.  It's a great set for so many reasons, but I love that you can really adapt it so you can work on a ton of occupational therapy and speech therapy goals.  I would love to hear from you and learn about any other adaptations or modifications you would make when working with your kids.  I am always a click away and love hearing your feedback and suggestions.


Tuesday, 12 March 2013

Hiho, Hiho, Hiho Batik We Go


I don't consider myself entirely crafty.  I love it and am inspired by crafty moms who spend hours crafting with their children.  When I had my daughter 3 years ago, I imaged making holiday cards for all our family and friends using her footprints or letting her go wild with markers and finger paints.  Well, that hasn't totally happened but as she gets older we are attempting it more and this year we made the cutest Valentine's Day cards.

Living in New York City has so many advantages.  Awesome restaurants, great shopping and amazing cultural opportunities.  Once you have children, you realize there are so many great places to go to as well.   I live in Park Slope and love it for all the reasons mentioned above.  However, we also are the home to many independent shops and not overrun by chain places quite yet.  Not long ago, one of my favorite shoe stores closed and I was totally bummed.  I had bought shoes for me and for Quinn and was sad that I wouldn't have this place so close anymore.  A couple of weeks after it closed, I discovered a kids batik clothing store would open in its place.  Not so disappointed anymore.  Right before it opened, I came to discover that not only would they sell insanely adorable clothing, they would have a studio in the back room so you could design and then paint your own batik article of clothing.  No longer sad about old shoe store but super excited for a new place to learn a new craft.

I have purchased many of the awesome shirts from Hiho Batik.  A couple of weeks ago, I had the chance to finally try out the studio in back with one of my favorite people.  There are certain kids I work with who I just connect to.   Years ago, when I began working in my private practice in the city, I had the great luck to meet Jen and Riley.  I fell in love with this family immediately and felt so connected to this little 1 1/2 year old girl who wouldn't stop crying for anything.  Riley and I shared a birthday and I felt that we were meant to be working together and when she finally stopped crying, a relationship was born.  Riley has graduated from occupational therapy with me but the relationship has lasted for 7 1/2 years and each year I try and do something special with her for her birthday.  This year I knew exactly what that would be....we were hitting up Hiho Batik together for the first time.

I didn't realize until I went to Hiho Batik how many occupational therapy goals can be addressed.  I quickly learned that this fun little afternoon taught me that I could use this with the children I work with to help them gain skills and feel better about themselves.  I could not have been more impressed with Julia and Robyn, the owners of Hiho Batik.  They were so welcoming and helpful for us novice batikkers.   When we were feeling stressed about what we were doing, they bent over backwards to help us and reassure us that we were doing a great job.  They offered us extra templates, gave us support and made us feel like we were doing a great job  As a therapist, it means so much to find a place like this that will make an artist of any level feel good about what they are creating.  I can easily suggest this place to any of the families I work with because I know that when they go there, they will be treated like royalty.  They will be made to feel like they are doing a great job and that is what matters to me.  I spend a lot of time talking to the children I work with that things don't have to be perfect; they have to try their hardest and their masterpiece will be just right.

*Improve eye-hand coordination/visual motor skills-any time you are working with a writing instrument (in this case, the wax "pen") and tracing something, you are working on eye-hand coordination
*Improve attention and focus-when you are tracing over your design with the hot wax, you have to pay careful attention and focus on the lines.  If not, your design won't come out the way you imagined it
*Improve creativity and imagination-if you decide you don't want to use one of the patterns that Hiho provides, you can make any design you want.  This is a great opportunity to have a child work on being more creative and thinking outside of the box
*Improve self-esteem-the look on Riley's face when she finished her shirt was priceless.  Then when she got to see her completed shirts (and they were AMAZING) she was super psyched.  She put her shirt on immediately and the compliments kept pouring in.  While this is an activity that is great for any school age child, if you have a child who loves fashion, this is the perfect activity for them.  How much fun is it to tell you friends that you actually created the shirt/dress/sweatshirt you are wearing???
*Improve social skills-this is a great activity to do with a friend.  You can talk about what you are doing, what colors you are choosing, why you have picked a particular template, etc..  I would love to plan a weekend event for The Meeting House down the line because I think it would be amazing and a great place to practice so many of the social skills that we have been working on this year.

I can't wait to go back to Hiho Batik with the kids I work with and with my family.  I know that my nieces will love this.  During my visit last week, Quinn and I made an awesome dress for her third birthday celebration.  While it isn't an ideal activity for a toddler, we certainly had a great time making her special dress together.  Here Quinn is wearing her lollipop dress for her candy store birthday party!
She was so excited to put it on and was showing it off to her friends.  I love that we had that special time with Riley and we created a memory together.  Every time I look at this picture or her dress, I will think of this amazing time we all had together at Hiho Batik.

For all my New York City readers, I highly recommend this place.  I am not the only one who thinks this place rocks.  Check out New York Magazines writeup about Hiho Batik.  They were included in this years Best of New York issue.  For all my out of town readers, if you have plans to come to NYC, definitely hit up this place.  It will make your trip to the city that never sleeps even more memorable.

I would love to hear from any of you who have visited Hiho Batik.  It would be fun to see what you or your child have created while there.  If you have any questions or comments, I am only a click away and love to hear from my readers.

Tuesday, 19 February 2013

Square by Square a Mosaic is Made

For the last several years, I have compiled a holiday toy suggestion list for the families I work work with; this is my 2012 Holiday list.  I am going to try and go through and highlight some of my all time favorite toys that make the list year after year.  The first one will be the Orb Factory Sticky Mosaics.


I discovered the Sticky Mosaics about 4 years ago when I was looking for new toys and ideas for some of the older girls I worked with.  I wanted a long term project that didn't involve coloring.  I stumbled upon the mosaic sets and have probably spent hundreds on them since.  They are brilliant and I still kick myself that I didn't think of it myself.  At this point, there are a variety of collections so you will easily find one that your child will love and be motivated by to work hard to complete.  They are colorful and some even have gem-like stickers to complete the mosaics which the kids love!  I have to admit, I am a big fan of some of their most recent additions to the Orb Factory family such as the room decor collection (jewelry boxes, picture frames, etc.).


What I love most about this toy is how many OT goals can be focused on with these mosaics.  First and foremost, it is a perfect activity to work on with children who have immature grasping skills.  The size of the mosaic tiles are just right to encourage a fine pincer grasp which many children with hand weakness don't have.  For some of my children who lack bilateral coordination, I will stick the stickers on the back of their hands so they have to pull the stickers off with the opposite hand.  For children struggling with learning numbers and colors, you can use this activity to work on those skills as well.  All the squares have a number on it and you have to match the correct color with the numbers.  My favorite thing is that after weeks of working on the mosaic (I typically see children one time per week so this can take several weeks to finish; if you are working on it at home, it most likely will not take as long) and the picture is finally complete, the look of pride and excitement on the child's face is priceless.  This ends up being ideal to work on improving a child's self-esteem and confidence.  Other OT goals are:
*Improving visual motor/eye-hand coordination skills
*Improving sequencing skills-give the child a number or color pattern to work on when putting the stickers on
*Improve upper extremity strength by putting the templates up on a vertical surface (easel or tape to the wall) and have your child have to reach up to put the pieces on; when at my sensory gym, I will have a child lie prone on a net swing and work on the mosaics.
*Improve focus and attention.  For some children, challenging activities lead to a significantly decreased attention span to said activities.  I will sometimes give my children a time challenge and say they have to put as many as they can on the template in a given amount of time.  I increase the amount of time with each visit.
*Improves social skills.  There are a few oversized mosaic collections that I have used at The Meeting House; you can put the larger kits out and tell a group of children to complete it together.  Assign a color/number to each child and make sure they work out any conflicts themselves.  

Over the last few years, Orb Factory has expended their products to include products not only appropriate for boys, but also collections for toddlers or children with more significant fine motor delays.

Instead of matching the little squares to a number, a child is expected to match the colors and shapes.  The tiles are slightly larger so this is perfect for children with smaller and possibly weaker finger muscles.  I have begun to work on one of the toddler sets with my almost 3 year old daughter and she loves it.  While she has no fine motor delays, she does need some help in building her focus and attention to activities that do not involve an iPad or television.  I know she will be very proud to show off her completed project when it is all finished!

I hope that you found this blog helpful and if you are looking for a reasonably priced and battery free gift, you should definitely check these mosaics out.  While you can find plenty of collections online, be sure to check out your local toy and book stores to see if they carry them first.  I know I always feel better about supporting small businesses when I can.  If you have any questions or would like to share any ideas or products with me, I am a click away and would love to hear from you!